CESM Configuration Changes
Overview
Teaching: min
Exercises: minQuestions
How can I make changes to CESM for my experiment?
Objectives
There are two main places where model configuration changes are made for CESM.
CASEROOT/env_*.xmlfilesuser_nl_*files
In this lesson we will learn some of the common configuration changes to these files and configure out new experiment.
Key Points
Common Runtime Configuration Changes
Overview
Teaching: 0 min
Exercises: 0 minQuestions
What are some common run time configuration changes?
How do I make these changess?
Objectives
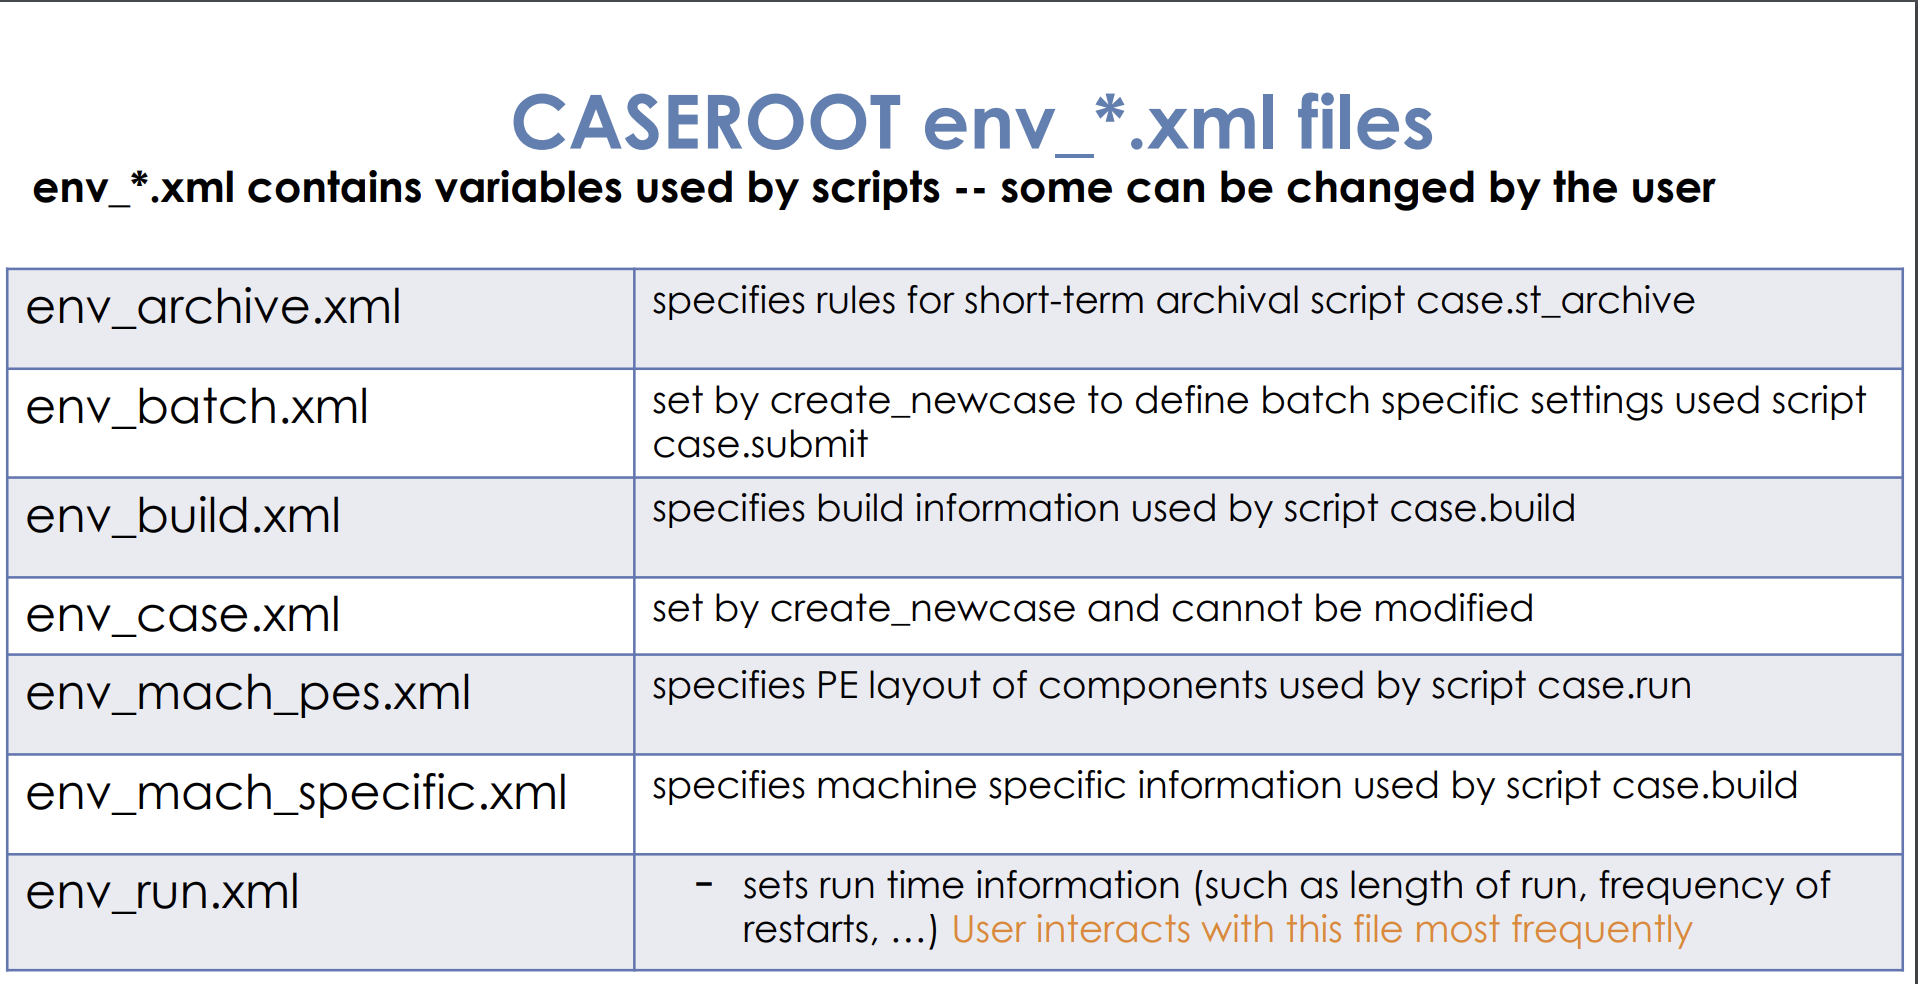
The CASEROOT/env_*.xml files control how we compile and run the model. They were creatd with the create_newcase` script.

These files are changed using the xmlchange command, but you can look at them to see what types of change you can make.
Let’s look at env_run.xml in the CASEROOT directory for our new run.
$ cd ~/cases/b.run2
$ more env_run.xml
The file contains ids and their corresponding values as well as a description of the id and sometimes valid_values.
Note that these values can be changed anytime during the model run.
Scroll down (using the spacebar) to find the STOP_OPTION and STOP_N ids.
    <entry id="STOP_OPTION" value="ndays">
      <type>char</type>
      <valid_values>none,never,nsteps,nstep,nseconds,nsecond,nminutes,nminute,nhours,nhour,ndays,nday,nmo
nths,nmonth,nyears,nyear,date,ifdays0,end</valid_values>
      <desc>
      Sets the run length along with STOP_N and STOP_DATE
    </desc>
    </entry>
    <entry id="STOP_N" value="5">
      <type>integer</type>
      <desc>
      Provides a numerical count for $STOP_OPTION.
    </desc>
The default STOP_OPTION is ndays and the default STOP_N is 5 which is why our first run ran for 5 days.
Exit by typing q
Let’s look at the file env_batch.xml
$ more env_batch.xml
Scroll down (using the spacebar) to find the PROJECT id. What is it set to?
Exit by typing q
To find out these values without looking in the files, we use xmlquery
$ ./xmlquery STOP_OPTION,STOP_N,PROJECT
Results in group case.run
	PROJECT: UGMU0032

Results in group case.st_archive
	PROJECT: UGMU0032

Results in group run_begin_stop_restart
	STOP_OPTION: ndays
	STOP_N: 5
To change these values, we use xmlchange ID=VALUE
This is great. We don’t have to remember which file they are located in!
Some Common Configuration Changes
STOP_N: Run length time interval
STOP_OPTION: number of intervals to run during the specified wall clock time
RESUBMIT: number of times to resubmit a run
Configure your New Case
Change the STOP_OPTION and STOP_N to Configure your case to run for 48 months. Do not submit your run yet!
Understanding RESUBMIT
This version of CESM2 (f19_g17 resolution) on Cheyenne simulates about 10 model years per wall clock day. Wall clock refers to actual time running on the supercomputer.
You can request a maximum of 12 hours of wall clock time when you submit a run. What this means that that if you want to run a long experiment, you have to run the number of years you can run in 12 hours, then have it resubmit itself where it left off. You can do this by giving it the right combination of STOP_OPTION, STOP_N, and RESUBMIT.What values of
STOP_OPTION,STOP_N, andRESUBMITwould you need to run this version of CESM for 100 years.Solution
STOP_OPTION=nyearsSTOP_N=5RESUBMIT=19
Key Points
Setting the RUN TYPE
Overview
Teaching: 0 min
Exercises: 0 minQuestions
What are CESM RUN Types and how do I set them?
Objectives
CESM has three types of runs that define how the model starts or is initialized. They are set by the RUN_TYPE variable in the env_run.xml files.
STARTUP: All model components are initialized from basic default initial conditions.HYRBRID: Model components are started from a user-specific CESM simulation., but I want to make some modifications to the run itself.- `BRANCH’: Model components are started from exact restart files and mimic exactly what the model would have done if it had been allowed to continue from where it was started.
When to use HYBRID vs. BRANCH
Use HYBRID when you do not need bit-for-bit reproducibility. For example, I want to start a simulation from a date in a previous one where I make a change to some part of the model. Then I want to compare my new run with the previous one. This would be a HYBRID simulation.
Use BRANCH when you want the model to reproduce exactly what it would have done if it have never been stopped, but you need to change it to have higher frequency output part way through the run.
If you use HYBRID or BRANCH you also specify RUN_REFCASE to tell it what case you are starting from and RUN_REFDATE to specify the date stamp of the reference case you are starting with
What is the
RUN_TYPEfor our new experiment?Use
xmlqueryto find out theRUN_TYPEfor our new experiment
Key Points
Namelist changes
Overview
Teaching: 0 min
Exercises: 0 minQuestions
How do I make namelist configuration changes
Objectives
Not all changes are made in the env_*.xml files. Some are make in CASEROOT/user_nl_*. These changes are specific to each component.
To make a namelist change, add namelist_var=new_namelist_var to user_nl_* for the specific component you want to change.
When you add changes to the user_nl_* files, model uses this to create the namelists it will use when it runs. We can see what this means:
$ cd ~/cases/b.run2
$ ./preview_namelists
$ ./xmlquery RUNDIR
$ cd /glade/scratch/kpegion/b.day1.0/run
$ more atm_in
How do I know what namelist options there are to change for each component? http://www.cesm.ucar.edu/models/cesm2/settings/current/
Configure your new experiment
Change the output frequency of your experiment to produce daily precipitation output along with default monthly output for the default set of variables.
In
user_nl_atm, add the following lines:
fincl2='PRECC','PRECL'# higher frequency output for PRECC and PRECL (convective and large scale precipitation)
nhtfrq=0,-24# h0 files will be monthly with default variables; h1 files will be daily with fincl2 variables
mfilt = 1,1# h0 files will be once monthly, h1 files will be once dailyCheck that everything is set properly wiht
./preview_namelists
Key Points